Creating Records in the Catch-all Data Repository
Specification for the New Release
This specification describes basic behaviour of submission workflow in the repository for the General community (i.e. all users of the repository unless stated otherwise):
-
all users who are members of appropriate VO can create records (such users are called submitters); this requires registration in the AAI system
-
fair use policy is in place that restricts submitters to create at most N_FIXME records containing at most M_FIXME bytes of data in at most K_FIXME files; they need to become members of a special group (handled by user support) to get unlimited access
-
submitters can create a new record using CCMM metadata model and upload files to the record (number and size of files limited by applicable quotas)
-
by submitting data for publishing in the repository, the submitter and the repository operator conclude the following Deposit Licence Agreement
-
submitters retain full ownership of their content, no rights are transferred to the repository operator
-
submitters shall provide metadata to the fullest extent possible and make every effort to ensure its accuracy
-
metadata-only records are supported (i.e. records without files)
-
until publication, the record is visible only to the submitter
-
the submitter can create a “share link (preview only)”, i.e. an URL, a recipient of the share link can view the record of metadata and download data files before the record is published (typical use: sending the link to a reviewer). Share links can have limited validity.
-
the submitter can create a “share link with editing”, in addition, it allows the recipient of the link to edit the record with the same permissions as the submitter
-
after clicking the “Save” button, the record is validated against the metadata schema, and any errors are displayed
-
the submitter can use “advanced check” functionality before submitting the record. In the advanced check, a LLM is triggered to check the metadata and act as a curator, providing recommendations for the submitter to improve quality of the metadata of the record. The LLM is operated on premise in the national infrastructure.
-
DOI policy: by default, records and all their versions are assigned DOIs; the submitter can opt-out from assigning DOI (e.g. for metadata-only records)
-
if a new version of a record with DOI is created, then the new version will get a DOI automatically
-
publishing: after clicking the “Publish” button, the record is published (i.e. it will become publicly available for the whole internet)
-
(for future releases) grace period will be supported for published records that allows to change data files during the period. After the grace period, data files are locked.
-
the record can be published with an embargo: metadata is immediately published, but record’s files are hidden until the embargo expires. The files are published after the expiration. (Share links to download the data are still supported for embargoed records as well.)
-
restricted records are not supported in the catch-all repository (i.e. records that are never published)
IGNORE THE REST FOR NOW!
In this guide describes the Catch-all Data Repository dashboard and the step-by-step process on how to create your record in the catch-all data repository.
Logging into the Repository
To be able to log in you need to be registered into virtual organization VO_FIXME.
Browse to the catch-all repository.
To manipulate your records and/or handle communities, you need to log in via the LOG IN button and select your home institution.
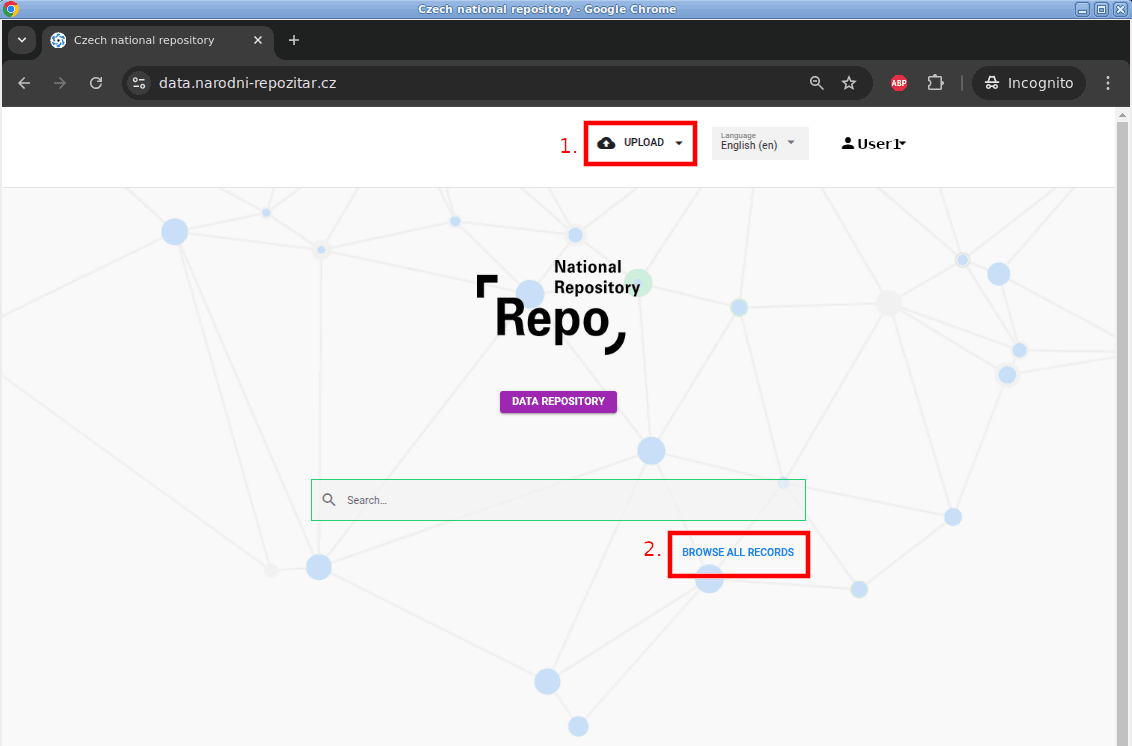
Naturally, authenticated users can search for records and/or BROWSE ALL RECORDS in the repository the same way as general public. In addition to that, they can handle communities and create new records.
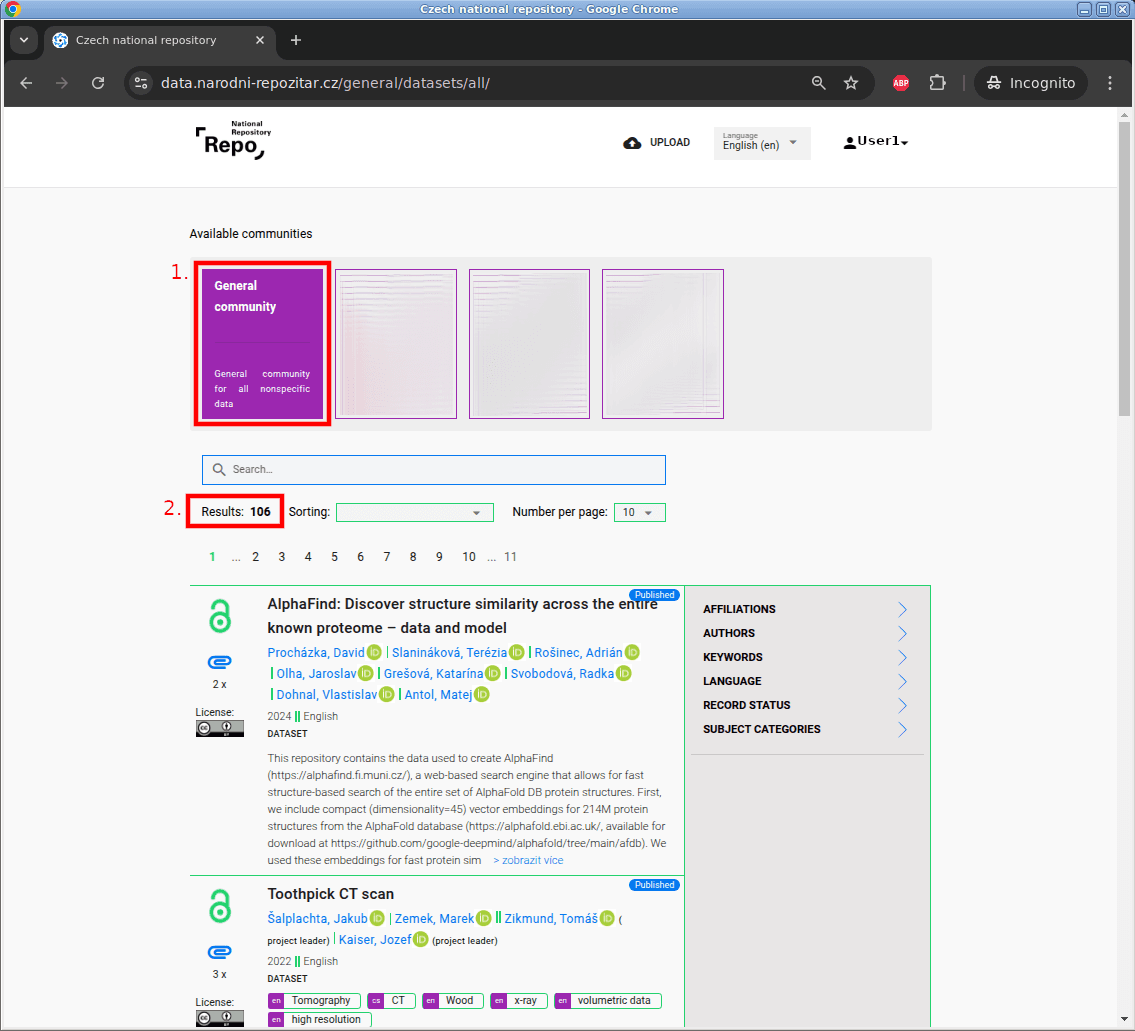
If you click on BROWSE ALL RECORDS you can see all public records. To see your drafts you have to select the community where you drafted your record. That is why the number of results can differ depending on communities selected.
About communities
Communities represent groups of users. The General community is the
community where new records are created by default.
As the repository is used by several user groups as a temporary solution before their specialised repository is established, you may see other communities as well.
Communities may have specific user sub-groups with specific permissions, e.g. to create records, to curate records etc.
This documentation describes the defaults in the General community, unless specified otherwise.
Creation of a New Record
Note that finalised records will get published in the Catch-all repository, either immediately, or after the embargo period elapses.
For dataset deposition into the repository, follow those steps:
-
Log in to the catch-all repository using you institutional identity.
-
Then click on Upload button.
-
Then you can start to fill in the insert form, which is quite self-explanatory.
a) The form is divided into multiple sections.
b) The starred fields are mandatory.
c) In some fields, it is necessary to select a value from a controlled dictionary. If a suitable value is missing, please contact the catch-all data repository support.
d) Check the context help of the fields.
e) Public access to the datasets is controlled with the Date available setup, see access control section. -
If you filled in all data fields and there are no errors you can save a draft. Error fields are denoted with red colour.
-
Attach the data/files
a) The formats of the data/files are not limited.
b) Maximal size of the data/files is limited up to 500 GB. Contact support if you need bigger datasets (although we would likely try to discourage you from that).
c) You can add descriptions to the individual files (pencil icon under the file name). -
Finish the upload by clicking on the green button Upload file.
-
Once you finish with inserting you can check your data set and its metadata.
a) The blue items are interactive and you can click on them to see other records with the same values.
b) In the left menu you can find record stage.
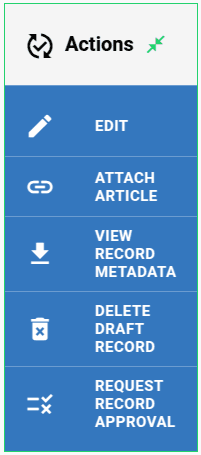
c) In the right panel you can find all available action relating to the records. The list of available actions depends on the record stage.
c) For advanced users and machine processing is possible toView Record Metadatain json format.
-
Until you
Request Record Approvalyou can alwaysEditthe draft - change the values or upload data.a) While uploading the file DO NOT FORGET to finish the upload via click in
Upload filebutton.
b) Once you finish uploading DO NOT FORGET to save the record. -
In case your record has a related publication/paper with DOI identificator, you can attach this paper to your record.
a) Currently you cannot attach other types of documents.
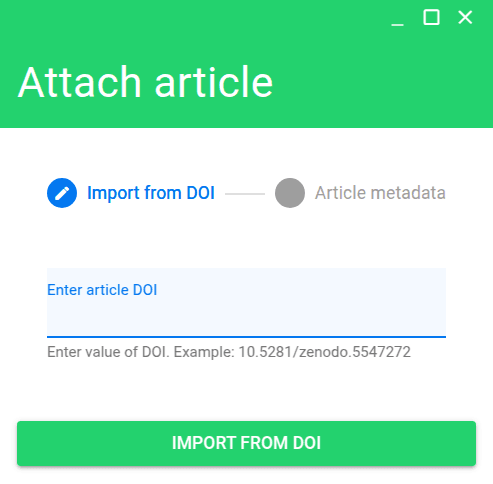
b) The steps to attach the paper is as follows:I. Chose the option “Attach Article”.
II. Insert the DOI identificator in the number format (NOT URL), e.g. 10.1108/nlw-09-2015-0068.
III. The paper metadata will be automatically fetched, please check that is correct and it showed paper which you wish to attach.
IV. Once finished click on “Create Article” button.
- Once you will consider your record draft is finished you can click on Request Record Approval button.
FIXME: this will become just “publish”, the checks are performed automatically.
a) During this step you can request DOI identificator.
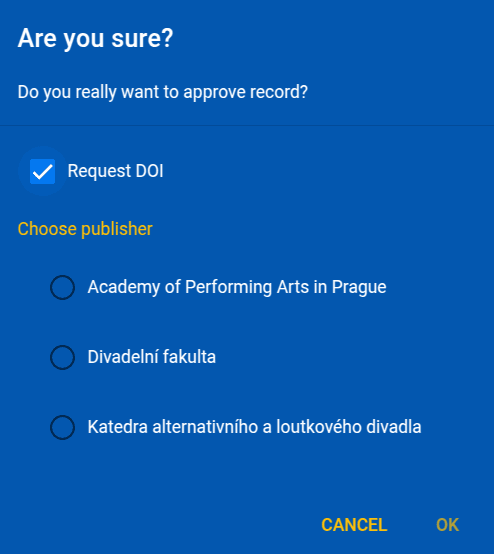
DOI Request
If you are interested in obtaining a permanent DOI identifier, you can request it when submitting the record for approval. In the blue column of the action list, select the option “Submit record for approval.” In the next step, the system will ask if you want to assign a DOI, so check the appropriate box. If you have listed multiple publishers in the record, you will be asked to select the primary one. The request is processed at the moment the record is published, and the DOI will be included in the record. You can freely manipulate the record and files using the edit action until you submit the record for approval. So, make sure to check everything thoroughly. After that, it is no longer possible to make changes to the record without the help of administrators.
You may be also interested in details on user roles and record life-cycle.
Last updated on
